
 But fear not! Here he comes now! Mek Gearsnik!
"Dat wuz a close un! See, da boss heard dat lotz of ladz are thinkin' dat sum greenskin called Ghazghkull Thraka iz da hotniz. Whalp! He almost blew hiz top at da newz! So he iz askin' me ta make him a new outfit - so de ladz will all KNOW who da biggest and baddest ork of dem all iz... Or elze he will blow MY top off! No time ta talk now! Me haz ta get ta werk!"
Mega-Warboss Chainsaw

Construction Steps
Step 1 - Bitz

A Warboss model from AOBR, a battle standard for Ork Boar Riders, horns and loincloth from a Beastmaster giant were the core pieces. I also used a bunch of smaller doodads from my bitz boxes. The Iron Jaw (shown assembled already in photo) is a section cut off from a crayola marker lid.
Step 2 - Framing the Face

The Iron Jaw is just super-glued together from the marker lid. I put a couple of wires into the back so I can attach it to the horns later.
Step 3 - Big Shoota

I fit these tubes securely into place by carving the normal barrel of the gun into pegs that the new bores will fit onto.
The hot pink color will not be part of the final design, FYI...
Step 4 - Trophy Rack

The default Warboss standard is cut to bits and carved up. I drilled a small hole in the place of one of the shotguns to turn it into a socket for the original standard. The handle for the removed shotgun is carved up to look like more of the waving hair.
The original post is carved along with the boar rider battle standard to form a 1/4" long hole-and-post assembly - don't want this huge display to break or fall over, do we?
Step 5 - Second Base Coat
I plan on making this model the first of my Bad Moons clan, so I'll need some yellow.
Anything that will use lighter colors gets a base coat that is closest to what I'll be painting them in the end. Mostly yellow as you can see...
Step 6 - Chainsaw!

Doh!
I quickly looked through my bitz box and carved up a chainsword arm and the power claw to fix this gross error.
(This little mistake would have definitely cost Mek Gearsnik his head! Major kudos to Aysha!)
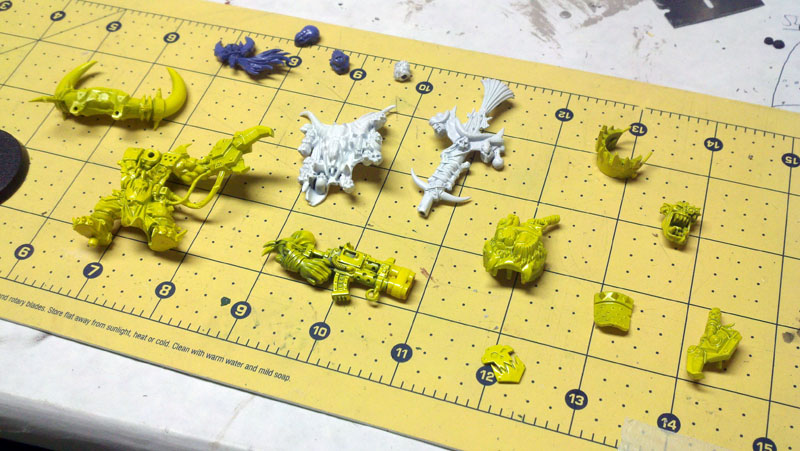
Step 7 - Painting Continues...

I thought I was going to go out of my mind... Maybe I did? Hmmm....
The picture shows all of the pieces in one stage of painting or another. Looking good!
Step 8 - Assembly

At this point, my efforts have been revolving around a mental image of how this is going to look.
Once assembled, my expectations were exceeded!
BWAH-HA-HA-HA!!!
The decapitated head of a UltraMarine serves to put Dark Purist and other foolish humie foes on notice!
All told, I think Mega-Warboss Chainsaw will make his enemies tremble with fear!

No comments:
Post a Comment